
The Difference between Tanuki and Tanuki Bonsai
In Japanese, "Tanuki" is the word for the Japanese raccoon dog, a canid species that are neither racoons or dogs, but are actually most closely related to foxes. In Japanese folklore, Tanuki were believed to be mischievous shape-shifters or tricksters. A tanuki bonsai is created by joining a living tree to an interesting piece of deadwood, creating a beautiful bonsai that looks natural. Tanuki bonsai trees are tricksters, just like their namesakes!
Creating a tanuki bonsai can make a young, affordable tree look much older and fabulous without waiting decades for it to develop. It's a great technique for bonsai hobbyists who are impatient, or who are interested in incorporating interesting deadwood into a bonsai composition.
While tanuki can be created from many different trees, this article uses Shimpaku (aka Kishu) or Itoigawa junipers as the example. The ideal Juniper to use for Tanuki will be about 10 years old, two to three feet tall and still able to bend and be manipulated into a channel carved into the deadwood. However you can start with different size live material or base it on the size of a piece of deadwood that you already have. If the material is too small it will not have enough wood in the trunk. If it is too large you will not be able to bend it to conform to the deadwood.
Looking for Kishu Juniper bonsai starters? We have plenty available here.
Steps to Bring Deadwood to Life through Tanuki Bonsai
First, find a fabulous piece of deadwood. Creating Tanuki is truly an art form, so the more fabulous the deadwood, the better. Look for a solid piece of wood (not rotted) that has interesting twists and turns.
Second, prep and clean the deadwood. You may want to strip bark to make the wood more interesting and you will need to remove any algae that may have developed and to clean-up any tool marks. The bottom of the piece can be saw-cut to allow it to sit in the container more easily.
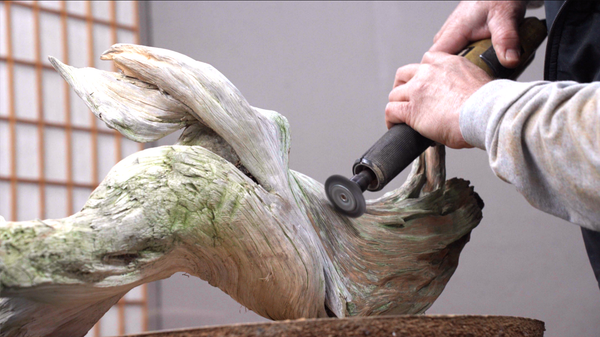
Third, apply lime sulfur. Use a mister or spray bottle with water to get the wood lightly moist before applying lime sulfur. Use a detail brush to "paint" on the lime sulfur; using water before adding the lime sulfur quickens the time it takes the wood to turn white.
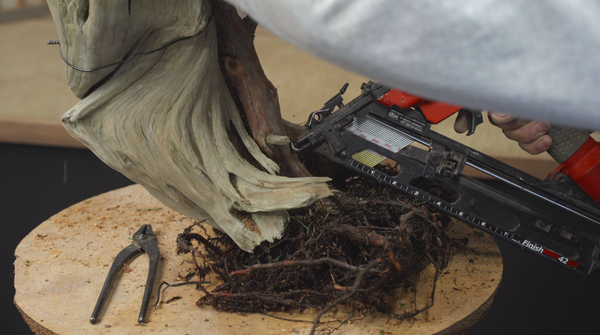
Fourth, securely attach live Juniper to the deadwood. You may want to add a nail gun to your inventory of bonsai tools! Be sure to select finish nails that will extend through both the tree trunk and the deadwood, to ensure that when it's time to repot, the entire composition can be removed in one piece. It's important for the tree to be securely attached to the deadwood to enable the roots to get established. If you don't have a nail gun available you can use finish screws (a type of screw used for trim work that has a very small head.)
Fifth, give the tree time to recover from this stressful operation. This may take 5-6 months. During this time, water and fertilize just as you would any other Juniper bonsai. The root ball will fill out and the composition can be maintained like any other bonsai.
Sixth, make your creative vision for the tree reality through wiring and styling.
Tanuki is a fun technique that can produce interesting and dramatic trees to add to your bonsai collection. Just remember to tell people your tree is a tanuki - you can trickster all you want in the creation of a tanuki, but you need to be honest and claim it as tanuki!
Want to learn more about Tanuki bonsai? Watch this video from our YouTube channel, "How to Make Amazing Tanuki Bonsai with an OG Trickster"
3 comments
Many places! Forests, oceans, nurseries, hobby stores, garden shops, etc
Let me know what you find …
What variety of juniper is this Jay?
Hi,
Where can you source suitable deadwood?
Thanks
Ronnie